Pages

Friday, October 28, 2011

Felonious Friday with Outlaw Gal - Perfect Distress


Hey it's Friday again and it's another Felonious Friday. Today I have the Perfect Distress Technique for you .. By that I mean using Perfect Pearls and Distress Inks.


First I took some Distress Ink and applied some to my Craft Mat. Then a spritz or two of water and I took my tag and wiped it across the ink. I dried it some and applied some more. This is so I get a pattern going on the tag. I wanted a blotchy look. I dried the tag. You have to because next I was going to use some Perfect Pearls and I only wanted the area I stamp in to be wet. I stamped my Snowman and leafy branches with Distress Ink and then right away applied the perfect pearls over it. When you buy the kits of Perfect Pearls they come with the brushes you need. I took the smaller brush to apply the perfect pearls and the larger one to wipe off the area around.. Now the important part is to spritz with water to set the perfect pearls.. Don't forget this step.

I then ran my tag through my Vagabond with a Texture Fade full of Snowflakes..

I edged my tag with Walnut Stain Distress Inks

A lot of Distress Inks were used in this project for sure for sure!!


I stamped my sentiment with Distress Ink again and used the Perfect Pearls not forgetting to spritz with water. I edged the sentiment with Walnut Stain also.

I'm using this tag to go on my Christmas Tree so I applied some trim and on the top made a hanger with the trim and some on the bottom

. Voila once again I have a finished tag with the Perfect Distress Technique!!

My Camera takes horrible pictures so you can't see it shimmering with the perfect pearls

but it tis, it tis!! LOL

You can buy all of the products I used at Outlaw Women Scrapbook Emporium.
See you next week.

Tuesday, October 25, 2011

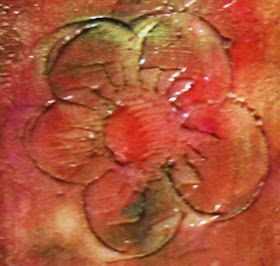
Make a Ribbon Flower


Make a Ribbon Flower
by
Judy Cantrell


Supplies:

Ribbon

Dye-based paint

Scissors

Ruler

Brads

Glue

Bling

Die cut or flower punch

Rubber Stamps

Archival Black Ink


 [Check OWSE for supplies]


Instructions:

  1. Cut six pieces of ribbon 5 ½” long. (14cm)
  2. Place the strips in a box lined with newspaper.
  3. Spray with a dye based paint.
  4. Add another layer of paint; this can be a coordinating color.
  5. Once dry repeat the back side of ribbon.
  6. After the second spray has dried stamp a pattern on the top side of ribbon using an archival ink.
  1.  Stack three strips in a six piece pie shape.
  2.  Starting at the bottom strip fold each piece to the center, secure with adhesive or glue dot. This is the first part of the flower.
  3. Take the second three strips, fold as the first flower.
    10.Stack the two flowers together by staggering the petals.
       Punch a hole  using a punch or Crop-A-Dile.  Secure with a brad.
   11. Use a circle flower punch with an old dictionary or stamp
       an image on flower circle using archival black ink.
    12. Apply the circle punched flower to the center of flower.
    13.   As a final step:
        apply a glue dot to center and then apply bling or stone to center.

Now lets see your flower used on a project!
Share a link here on this blog!


Saturday, October 22, 2011

Sunday Papers with Jeanette - 1 Stamp 2 Ways

This is a short post today due to being a bit under the weather.

When I think of using a stamp like this, I immediately think
antique browns or black.  Art stamps work very well with color.

Version 1
Supplies Used


The following supplies that I used are available at OWSE

or


Version 2
Supplies Used


The following supplies that I used available at OWSE

Copics
Background - G24 - Willow
Hair - E57 - Walnut
Face - YR61  - Yellowish Pink
Column - V01 - Heath
Column - V05 - Column
Wings - YR23 - Yellow Ochre

Next time you grab your favorite art stamp think about
coloring it up a bit.  I like the results, don't you?

See ya' next week when I will be posting the 
Sunday Papers on Saturday in conjunction with our
Halloween Gala being held that day at 
If you haven't registered at our Events site please do.
You don't want to miss out on our party.
And, pack those pjs because Robyn is having
a Slumber Party that night.

Until then....
Jeanette


Friday, October 21, 2011

Felonious Friday with Outlaw Gal - Resist Kissing


Like my Title "Resist Kissing"? No I don't resist Kissing.. LOL

That's the two techniques I did on this ATC Card...

LOL Fooled you!!


To Start out with I grabbed my White Embossing Powder


and

Two Different colors of Glimmer Mist

in this Case

Marshmallow

and

Alaskan Salmon

I stamped the

Stamp from Tim Holtz


This stamp is fabulous for all sorts of background techniques

poured the embossing powder and heat set.

Once it cooled I sprayed with the Glimmer Mists

then wiped it off with a paper towel

and there is my first Resist..

wow do I love how this came out..

I inked the Edges with


Then I took another Timmy Stamp set out

His


This was the first time using the set.. it's a really cool set for this season..

being Fall.. duh and duh again!! LOL

Here is where I kissed.. ROFL!!

I inked the stamp with VersaMark

then using his Reflections Set

I inked the numbers stamp with

Distress Ink Vintage Photo

and stamped onto the Papillion Stamp

Get it??? I kissed the first stamp...

Didn't even dance on the tables to kiss it!!

LMAO!!

The Reflections Stamp Set is great for the Kissing Technique

as all the numbers and letters are backwards..

You have got to check out this stamp set!

okay so I kissed the stamp and then I stamped onto


You need to really dry this good with your heat tool

once dried I took

some


and dabbed it all over

then wiped it off with a paper towel

and cut out the leaf..

Inked the edges once again with

Walnut Stain

I adhered it to my card with foam dots

added some bling because I have to add bling now.

tis the season!! LOL

almost

There is my kissed resist ATC Card..

All of the products I used you can get at OWSE

Click on each one or just hop on over to the shop

and shop till you drop

Get up and shop some more!!

See you next week with more

Felonious Friday


Tuesday, October 18, 2011

Burnt Brown Bag

Welcome to Technique Tuesday! by Judy Cantrell 
My mother suggested that I share a technique seen
many years ago on Aleene’s Craft Show.

Burnt Brown Bag
When Aleene shared this technique my mother and I made wall
decorations with these leaves.
Instructions:
Begin by die cutting the leaves (Tatterered leaves)
using Kraft paper or brown grocery bags.
You will need a set of two leaves for each leaf.
  Use a credit card to apply Aleene’s glue on inside of one leaf, cut a piece of 22
gauge floral wire 3 3/4" long and place down center of leaf.
Leave a small portion of the wire out from stem to use as a holder.
Adhere the two leaves together. Let dry.
   Apply (Aleene’s) glue with your finger over the front and back of leaf with a
generous but even amount of glue with no paper showing.
While the glue is still wet, light a white emergency candle with no scent
in a well ventilated area if you are doing a lot of these at one time.
My suggestion: use exhaust fan in our bathroom for this technique. 
Use pliers to hold wire extending out of leaf in the flame until it is black in color.
It may take a few tries to get it right, bubbling glue is OK.
If you have done it correctly the glue will be set and will not come off. Place leaf back into the flame if you see spot of wet glue.
When you are finished with the leaves wipe some of black soot off and then dry
brush color on each leaf. These leaves with last for years.
I used Viva Inka-Gold on my examples.
Years ago when Aleene did this technique she use Rub 'n Buff.
A gorgeous wreath or table decoration can be made using these leaves.

Supplies for this technique:
Tattered Leaves  Die
Aleene’s Glue (Brown bottle)
This technique works with this glue.
22 gauge floral wire
Paint
Kraft paper or brown bag
Emergency candle with no scent


Sunday, October 16, 2011

Sunday Papers with Jeanette....INK, Part One


INK, Part One


I can't be really technical with you about all of the inks on the
market today but I can share with you what I find interesting.

Recently, an article about ink in CardMaker Magazine caught my eye.
That is how I found out about a new type of ink that is on the market.
It is a hybrid ink.   Uhm?   How about you, have you ever heard of Hybrid Ink? 
If not, here is what I found out about it.

But, first lets have a little primer on our more familiar inks.

Dye Based Ink
Used in most basic stamping. Makes a nice sharp image and dries quickly.

Pigment Ink
Used in basic stamping but is thicker and slower to dry. Also, can be used for heat embossing.

Chalk Ink
This ink makes a softer image when stamped. Great to use for distressing. Very quick drying.

Solvent Ink
Used for stamping on acetate, glass, metal and glossy cardstock. Really quick drying.

Watermark Ink
This ink is colorless and when used leaves a tone on tone image when stamped on darker carkstock. Dries quickly.

Embossing Ink
Thick, clear and slow drying ink used for heat embossing. 

And, now we come to the Hybrid Ink. The newest type of ink available. This ink is a mix of dye based and pigment inks combined to replace the ink used in most of the applications listed above. It does need to be heat set on a nonporous surface and it dries too quickly to use for heat embossing.
This hybrid ink is manufactured by Stewart Superior and the product name is Palette.


The Palette Hybrid ink pad represents an innovation in stamping ink technology. It eliminates all the confusion over which ink to use for what surface - because it works on everything and is a non-solvent ink. It doesn’t smell bad , it’s nonflammable and it won’t immediately dry out. It dries instantly on paper and porous surfaces and requires a heat-set on glossy surfaces and fabrics.
from Stewart Superior

Here are the Palette colors. You will find all of these right here  in the OWSE shop.


I've just ordered some of the Palette inks to try.    As soon as I receive them and can play around with them...I will share my findings with you.  Stay tuned for INK, Part Two coming soon.

See our complete inventory of Inks, HERE, Outlaw Women Scrapbook Emporium.  Remember, if you don't see what you want....just ask.  jeanette@ididitcreations.com

Until next time....Jeanette


Friday, October 14, 2011

Felonious Friday with Outlaw Gal - It's a Vintage Halloween


Cindi and I had a fun trip to Little Nashville, Indiana last Saturday and in one of the Scrapbook Stores I picked up some Vintage Halloween Collage Sheets. I was dying to use them when I got home.. I was so inspired from our trip that I went right to work.. No that's a Lie I took a nap first. LOL


anywho I created this card using one of the images.. First I found a Postcard Image online. Google Vintage Postcards... I really want to find a Postcard stamp if anyone knows of someone that makes one let me know. I printed this off and cut my image out of the collage sheet then I went to work creating my card. I Distressed the edges of the Designer Paper.
I have got to tell you about this Paper..
It's Bo Bunny's
"Forever Fall" Collection.
This paper is to die for!! Absolutely George Us! and yes we carry it. It might be out of stock by now but I can get it.

You have got to check out these papers!!

anywho again I edged my papers with Distress Ink "Vintage Photo"

I also Distressed my image with Vintage Photo..

I added the Faux Postage Stamp to the Post Card.
This is a rubon and I love love them.. I use them in my Art Journaling a lot.

I then Stamped the Postcard with a Script Stamp and added the leaves stickers.
I had those from my stash. I hardly use stickers but really like these.

I used my Die the Mini Flourish from good ole Timmy Holtz. I adhered the paper to some grunge paper and used my Vagabond Machine.

Added the flower after I distressed it with some Vintage Photo ink.

Then popped two yellow bling blings on my creation..

and that's my Halloween Card I'm sending to my Sister this year..

The Dimension of my card is 10x 5.. in other words 5x5 card. I always want to know this when I see a card I like on the net and people never tell you..

Well I'm telling! LOL

See you next week with more Felonious Friday!

Tuesday, October 11, 2011

Technique Tuesday "Embossed Tiles" by Judy


Welcome to Technique Tuesday!

By Judy Cantrell


For this week I’ll use a

Technique from

“Altered Surfaces"

By Chris Cozen

This is a

Design Originals

workbook that

has
many projects

using Acrylic Paints with

Gels, Medium, Grounds & Paste


These products can be used on
Paper, Canvas, Board and Plastic

This week I'll share

a project from page 48

“Embossed Tiles”

Light modeling paste makes a lovely textured white on a project. Adding color adds interest and with a
finishing touch of Tar Gel Medium. You can make a very nice project
suitable for gift giving using this technique.

Directions:

  1. Apply a smooth finish of light modeling paste to a piece of canvas.
   2. Apply a stamp into the paste while still wet, lift off and then
       clean  stamp with an old toothbrush before moving on
        to the next step.
example #1

Note: adding the right pressure to the stamp takes practice. I stamped this image on card stock instead of a canvas as my example.
  3. Allow this to dry.
      4. Wet surface of modeling paste with a wet paint brush.
        5. Start by adding transparent colors     
           of paint with a small paint brush or by dripping from the bottle. 
           Note: Bright color family works best for this technique.
           If you have enough  water on the piece the colors will spread
           like magic to look like embossed tiles.  
           Leave some areas light in  color. Let dry.

      Close up of one finished flower
           A suggestion for colors:
          Quinacridone Red, Quinacridone Magenta,
          Permanent Violet,  Quinacridone Burnt Orange,
          Hansa Yellow Medium, Nickel Azo Yellow, Raw Sienna
          and Iridescent colors; Gold and Bronze.

        6. Re-wet the surface and then add gold iridescent paint
           to the white areas. Allow this to dry.
        7. Coat the entire surface with Clear Tar  Gel using a palette knife
           and allow this to dry thoroughly.

      Larger view of finished piece

      Note: The instructions in this book suggested foam stamps. I used a wood mounted stamp. It also suggested a square piece of canvas. I used card stock.

      Supplies:

      Light Modeling Paste
      Clear Tar Gel
      Stamps
      Golden Paints
      Canvas

      Sunday, October 9, 2011

      Sunday Papers with Jeanette....The Sad Story of the Mummy Card

      Designed by:  Jamie Hurley

      I saw Jamie's card in the current issue of Paper Crafts Magazine.   
      This is my kind of cute and I wanted to make one.

      I gathered up the following supplies


      I didn't have any orange card stock so I printed off the size that I needed.
      Next I cut my panels to size and then the wrapping of the twill began.
      Now the sad story begins.   The twill that I had ordered from
      OWSE was not any kind of twill that I was familiar with.
      Thin and whimpy not strong and sturdy like twill should be.  


      !!! Phooey !!!
      It looks terrible.
      No comparison to what Jamie used for her card.  I didn't want anyone
      else being as disappointed in the product as I was so it is no
      longer available in the OWSE shop.

      I did list the instructions from
      Paper Craft Magazine for you.  I've subscribed to
      this magazine for quite awhile now and I'm never disappointed
      in the cards shown.  Lot's of good ideas.  

      Instructions for
      Mummy Card by Jamie Hurley 
      Paper Crafts Magazine

      Make card from cardstock
      Adhere twill around carstock rectangle, mat
      with cardstock and adhere to care.
      Circle punch cardstock and adhere
      Stamp sentiment
      Finished size:  4 1/4" x 5 1/4"

      Thank you Jamie and thank you Paper Crafts Magazine.

      Supplies that I would have used to make my Mummy Card.

      I love these scissors.
      My go to for stickum'
      Cardstock - Black, Orange and White
      Twill Tape or Ribbon 


      Friday, October 7, 2011

      Felonious Friday with Outlaw Gal - Painting with Distress Inks


      Friday once again and this week I've been playing with Painting with Distress inks.. This is so fun and so very easy.. First with this card I took some book paper and adhered it to some cardstock to give it more substance. Book Paper is very flimsy when you use it alone. Distressed the edges with my Distressing tool.. For my Birthday I'm getting that electric Distressing Tool. I'll let everyone know how I like it..


      I Stamped over it using my Background Stamp with Versamark Ink and then poured white embossing powder and heat set.. I then stamped my flower on cardstock and did the same thing with the Versamark.. Heat set the white embossing powder.. Then I used a small paintbrush and some distress inks and colored the flower .. well actually no I didn't.. duh and duh again .. I used a Nigi brush.. easy peasy.. Once it was dried I adhered it to my card and then added the twine.. Voila a Card that looks good and was so easy to do...

      We carry all these products at OWSE . Just click on the product and you will get to it in the Emporium..

      Have a wonderful weekend.. I will I'm going to Little Nashville to check out this Scrap Store.. It's my Birthday Present from Me to Me. LOL Stamps come here you little rubber thingy's.. I want stamps more stamps and more stamps!! ROFL

      Tuesday, October 4, 2011

      Shaving Cream Technique


      Welcome to Technique Tuesday!

      By Judy Cantrell


      Shaving Cream Technique


      Supplies:

      Card stock

      Shaving Cream

      Adhesive backed Laminate

      Dye Reinkers

      StazOn ink

      Paper Trimmer

      Squeezee

      Bone folder

      Embellishment


      Visiting an old technique I’ve seen around many years.

      Instructions:
      1.        Use paper trimmer to cut a piece of white card stock 4” x 5 1/4.” Set aside.
      2.        Spread and smooth a strip of shaving cream onto a craft sheet.
      3.        Drip four or five drips of each color of reinkers over the surface of shaving cream.

      Note: three colors would be max for this technique.


       4.        Swirl the inks together into a pattern with the end of a small paint brush.
       5.        Press white card stock on top of shaving cream mixture; then press down a little to ensure the shaving cream makes good contact with white card stock. 
         
       6         Use squeeze to remove excess sharing cream mixture in a one stroke method; blot off each time on paper towel.
       7.        Reapply shaving cream mixture if you have removed too much.
       8.        Let dry.
       9.        Apply shaving cream piece to clear adhesive backed laminate. Press down to smooth with a bone folder.


      10. Stamp images with Stazon inks.

      11. Add embellishments and adhered to folded card to finish.


      Now Let's See What You Do with This Technique! 


      Sunday, October 2, 2011

      Sunday Papers with Jeanette...Halloween in 10 Minutes or Less

      I have a couple of simple things to make for Halloween.  
      My children are grown so Halloween is not such a big deal
      at my house anymore.  Children sure make a difference in how Holidays
      are celebrated.   If you are like me, these easy peasy ideas may be of help you.

      Here are the supplies that I used
      (links to supplies listed below)


      First I made a simple tag using a die cut from the paper collection
      and a stamp from these fun Halloween Stamps.  Did some
      direct to paper smudging with black ink tied on a ribbon and in
      less that 10 minutes....done.  Quick and easy.
      I love this stamp set.  


      My next project is a quick and easy card.  


      What I used here is a vinyl stick-on for a window.  I used a sheet of
      paper from the collection.  It doesn't show that well here but
      the colors are purple, beige, gray with silver metallic stripes.
      The sentiment is another stamp from the collection that has
      been stamped with black ink on silver metallic card stock.
      I blotted it a bit to dry it quickly and make it a little more distressed
      and maybe make it a bit more spooky.   
      Another project completed in less than 10 minutes.

      I really love the collection of papers.  They are grown up Halloween patterns
      that can be used all year long.  Some even have steampunk potential.  
      The name is 13th Hour, 6 1/2" paper pad by Kaisercraft.  
      Here is just a sample of the great patterns.
      Perfect for someone like me that prefers not to buy 
      a lot of Holiday specific papers.


      Die Cut selection

      Now for the links to the supplies available at 

      13th Hour Paper Pad by Kaisercraft
      Paper Pad 6.5"X6.5" 24 Sheets-10 With Varnish, Foil Or Die-Cut
      Vinyl Silhouettes by Little Yellow Bicycle
      Haunted Hallows Clear Stamps by Teresa Collins


      Until the next edition of Sunday Papers make every day a creative day.


      Jeanette