Pages

Saturday, December 29, 2012

Saturday Special - Collage, Collage, Collage

Hi Everyone, I hope everyone had a wonderful Christmas. I've been busy creating a lot of Collages this year. I thought I'd give you some in's and outs on how I create my backgrounds and Collage my pieces.

This Piece is in Honor of the Horrible Tragedy that Happened this week at Sandy Hook Elementary School. I just can't get it out of my mind.

Anywho I start out by collaging the pieces of Designer Paper. In this case I kept my colors soft and wintery looking.


Then I add some Acrylics paint to give it some color. Sometimes I add a lot and sometimes less to show more of the design of the paper.


I dry each layer of paint so I don't make mud when combining colors. 

Then I go to town doing my background.

I usually take a stencil at this point and spray some inks through the stencil.. I found out that if I don't like what is going on say it sprayed too much or I don't like the stencil at this point I can spray some water down and wipe off what I don't want on the substrate..  For instance when your spraying inks you can get this mist that comes down if your stencil wasn't close enough to the substrate.. I can wipe this off where I want to.

I heat set my stenciled inks. I found it makes them less water soluble.. They will not smudge as much.. They still smudge but just not as badly.


I add some stamping now both with inks and with acrylic paint.  I'll chose colors that go with my palette to blend the stamping in and also Black ink so it stands out. 

I use Archival Inks for this as if I want more layers it won't smudge.


At this point I might do some doodling on the substrate. Maybe some black acrylic circles, some marks, some borders .. Just get some doodling down..

another fun thing to do is to get a used toilet paper roll and put some paint on it and stamp with it..

The same with some corrugated cardboard.. There are so many household things around the house you can find to stamp with.

Now on this piece I cut out my trees using Designer Paper. I cut my first one out and then used that as a template. I could have die cut them also. I just didn't want my pieces for the tree to look totally perfect.


Glue down your trees and now to intergrate them into the piece.

First I will give some shadows to my trees by using a Pitt Pen.

Pitt Pens will smudge if your quick enough when adding the ink.

So quickly go around the edge and with one hand add your color and the other smudge it.

Then take some Black Acrylic Paint or you can also use a Black Pitt Pen and go around the edges again..

You don't want to be perfect about this. You want it to have that doodled look.

Now it's Rub on time.

I get some rub ons and randomly place them on my Tree's and on my Canvas..  I do the same with some stamping and mark making. 

Keep going until your trees are totally integrated into your Canvas..

I then printed out my Words and cut them up.

Now sometimes I might edge these pieces of paper with a Brown Distress Ink..

This time I adhered my words with Matt Medium and then took a Green Gelato and smudge it onto the paper with my finger.

Then I edged it with Black Acrylic Paint... Once again I don't want this to look perfect.

Time for more Mark Making on the trees and in the background until I felt I was finished.

and my Collaged Wintery Piece is done!

I'm sending this piece to Sandy Hook Elementary School

along with a card for my condolences...

If you would like to send a card to the school

here is the Address

Sandy Hook Elementary School, 12 Dickenson Drive, Sandy Hook, CT 06482. 

I Hope everyone has a wonderful New Year and please stay Safe..

Robyn


Friday, December 28, 2012

Friday Feature - enjoy the journey

Hi friends.  It's Melody with a Friday Feature for you.  With all the family things going on for Christmas, I didn't get a chance to sit down and create until today, so I'm a little late posting. 

My project today is a tag that could be attached to a gift.  I started with a pre-cut tag and swiped some distress stains onto it -- peacock feathers, ripe persimmon, and wild honey.  While that was drying I die cut a rosette from some pattern paper and put it together with hot glue.  I love how the geometric pattern on the paper changes when formed into the rosette. 

I stamped the tag with Dylusions stamp set, around the edge, in jet black archival ink and colored in the leaves with shabby shutters and crushed olive distress markers.  Then I added some vintage photo distress ink with a foam ink applicator and distressed the edges with a distressing tool. 

On a piece of ivory card stock, I stamped the sentiment from a Tim Holtz set, just thoughts, and cut it into a flag shape, adding vintage photo distress ink and distressing.  I attached this piece to a black flag with my tiny attacher. I pierced lines along the top and bottom. 

I used a strip of black card stock and punched several 7/8" circles, which I cut in half and added along a couple of the edges of the tag.  I decided to use the negative piece as well, tucked in behind the sentiment. 

To help the rosette stand out a bit, I cut two black squares and offset them behind the rosette.  Both the rosette and the sentiment piece are attached to the tag with dimensional foam tape. 

My tag just wasn't complete without a butterfly, so I dug one out of my stash of die cuts (Tim's mini butterflies movers & shapers die), and added it to my tag. 

The tie is made from black cord.

Many of the products used on this project can be found at Outlaw Women Scrapbook Emporium

Thanks so much for stopping by. 


Monday, December 24, 2012

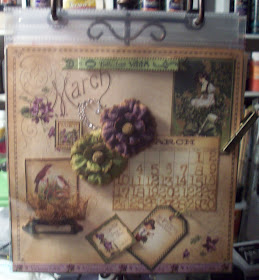
A Place in Time Calendar by Graphic 45

Merry Christmas and Happy Hannakuh!
Today I'm sharing a calendar gift with you. I had such fun making it. I used Vintage Photo Distress Ink on all the paper edges and on the December Page I combined that with Evergreen Bough Distress Ink. I used the design team for Graphic45's blog for my inspiration.

Argghhh....I cut off my head and wore a too tight shirt...please watch the calendar instead of me!!!
You can order supplies from Outlaw Women Scrapbook Emporium.


Her are some photos of the pages!


Saturday, December 22, 2012

Saturday Special - Easy Peasy Snowman Ornament

I'm still into creating Ornaments, can't stop now!.. Last year I bought Tim Holt'z Winter Wonder Die and never used it. So I got that out determined to use it this year. LOL  I grabbed some Grunge Board and some of Tim Holtz's Tissue Wrap - Composer - and glued it on to the Grunge Board. I cut out the Snowman with my Vagabond Machine. I cut it out again in Black to make the hat.


Now I went to town painting his nose and eyes. Then I cut out some Designer Paper for his scarf.. Hot glued a button onto the scarf and then gave it some shadows by painting around everything in Black Lines.. 

I then Used "Brushable Glue" by Sparkle and Sprinkle. I have had this glue for years and just love it when you want to use Glitter and there are details. I put some glue on his belly and a little on the middle of his face. I then sprinkled Dazzling Diamonds Glitter on him.. Then on the edges I again applied the Brushable Glue but this time I used Diamond Dust which is a bigger glitter. On His Hat I took my Snow Marker and added a touch of snow..

Easy Peasy!! This took all of about a half hour to do. I'll probably put a small hole in his hat and hang him on my tree..

Many of the Products I used I bought at Outlaw Women Scrapbook Emporium 

Give this a try, it's a lot of fun and real fast to make.

Have a Happy Holiday!!

Robyn


Friday, December 21, 2012

Friday Feature - blessings

Hi friends.  It's Melody, here with another Friday Feature for you.  Today I have a card that was part of my technique class yesterday.  The technique featured stamping on canvas. 

I started by stamping the green card base with a background stamp, victorian diamonds (Rubbernecker), with dark brown ink.  Every layer on the card is edged with vintage photo distress ink. 

At the bottom of the card is a piece of rust card stock, stamped with a sentiment from an older set from SU, graceful words. 

The die cut circle is part of a brown paper grocery bag, stamped with a Penny Black background, circles and lines. 

For the main image, I die cut a piece of canvas with mini labels movers & shapers (Tim Holtz/Sizzix).  I then stamped the leaf from natural beauty (SU) in jet black archival ink, holding the stamp against the canvas a bit longer than normal to make sure the ink settled into the fibers. 

My canvas is just yardage from the fabric department at my local Walmart, but you could also use sticky back canvas.  I heat set the ink with my heat gun to make sure it was dry. 

The next step was adding color.  I decided to try watercolor pencils (I'm using Inktense) to see how well they worked on canvas.  As you can see on the center leaf in the photo above, I just added a small amount of the pencil and then used a water brush to blend it and spread it out, being careful to stay within the lines. 

In the above closeup, you can see the color is more vivid when wet (bottom leaf) and fades a bit when it is dry (top leaf).  I dried it with my heat gun. 

I wanted to add some vintage photo ink along the edges, so I very carefully used a small sponge dauber and pounced on the ink rather than rubbing, so that the threads didn't fray.  Sometimes that would be OK, but on this piece, I didn't want fraying.  I again heat set the ink before attaching the canvas to my card with Fabri-Tac (Beacon Adhesives).   And here is my finished card. 

I'm really happy with how well the watercolor pencils worked on the canvas. I hope you get a chance to try this technique.  I would love to see what you make with it. 

Some of the products used can be found at Outlaw Women Scrapbook Emporium.  Thank you so much for stopping by. 

Tuesday, December 18, 2012

Poinsettia Tag


Sharing another tag I made using Tim Holtz dies, embossing folder, ink pads, paints and more.
Use Vagabond to die cut Tim's poinsettia bigz die with grungepaper. Color poinsettia with bottle and fire brick dabber paint, heat set to dry, squeeze a tiny bit of rock candy distress stickles on craft sheet, then use your finger to spread a thin film over the poinsettia and then heat set to dry.
Use distress ink to ink Tim's TF embossing folder, embossed with Vagabond or similar tool. Clean embossing folder with soap and water, dry throughly.
Merry Christmas was made with my digital craft cutter and then painted with bottle dabber paint. The star was painted with metallic white paint. Add the layers of poinsettia with glue, the center flower was painted with gold dabber and then clear dots were added to center with glossy accents.
Add red trim, bling from my stash of finding and old jewelry to finish my tag.
Find many of the supplies I used on this tag in club; http://ididitcreations.com/club/

Monday, December 17, 2012

Suburbia and Stamping Gear

Sharing a couple of fun things today!


Here are close ups of the stamping gear designs:


Does anyone remember Spirograph???
Check out Outlaw Women Scrapbook Emporium for inks, and Stamping Gear!

Saturday, December 15, 2012

Saturday Special - Some Mod Podge, Ornaments and Glitter

Hi Everyone I had to show you guys what I was doing at 2:00 in the morning the other day. I had these clear glass ball ornaments from last years buy at Michaels and I just had to use them. I grabbed some of the Tim Holtz Tissue Wrap - Composer and my Mod Podge and got to work covering the balls. First I cut some small pieces of the wrap. The smaller the better as these ornaments are small. I didn't worry too much about the tissue paper not being perfectly on the balls. I coated the ball with tons of Mod Podge both under and over the paper so that when I was done covering it I could smooth it down with my fingers.. As best as I could get it down.. Maybe I should have gone one step further and cut my pieces into oval shapes or something like that but I do like a Grungy look to my work. Plus I'm too Lazy! LOL


I let this dry good. Mod Podge dries clear.. I did use my Heat Gun as I was getting impatient for it to dry. LOL  Once it was dry I had printed a strip of paper I had made in my Paint program. I had put a Christmas Saying on it. One says " Jingle Bells, Jingle Bells Jingle all the way" and the other says " and on Earth Peace, Goodwill toward Men..."

I printed out this strip. If your going make one make your strip the size of the circumference  of your ball and about a half an inch wide or smaller..

Put some of the Mod Podge around the ball and adhere the strip. Be careful. My first one didn't go evenly around the ball but up and down it.. You can't move it once it's going down as you will rip the paper. I did! LOL

Now I let this dry good again with my Heat Gun.. and then once it was dry I put another layer of Mod Podge all over the Ornament.. Then I poured Diamond Dust on it! Boy is it sparkly!! I didn't like the Diamond Dust covering the strip so I smudged most of it off of it!! .I would love to try this with some glitter that is clear. I was amazed that I didn't have any!   being the Hoarder I am! LOL.  I was going to use Stickles in the Rock Candy but being the impatient one I didn't want to wait for the Stickles to dry.. Stickles take a long time drying. 

I forgot I had some Stampin Up Dazzling Diamonds so I tried that on another ball..


The Picture doesn't show the strip well with the words but once I smudged some of the glitter off it looked pretty good.

On the top of this Ornament I used what is called a "Snow Marker" to make it look like there was
snow coming down..

These were quick and easy but ooohhhh very messy projects!!

Now I have to go and get some of this glue and glitter off my fingers!! LOL

I'd love to see yours if you give this a try

email me at

owse@ididitcreations.com and show me..


All my supplies were bought at


except for the Stampin Up Glitter..

and of coarse the ornaments..

Hey thanks everyone for stopping by!


Friday, December 14, 2012

Friday Feature - eggshell ornament

Hi friends.  Melody here with another Friday Feature for you.  I love being able to create something from an item that would normally get thrown out in the trash.  Some time ago I came across a tutorial to make a trinket box covered with crushed eggshells.  I loved it, so I started saving egg shells.  I always rinsed them well, removed as much of the thin membrane as possible and let the dry thoroughly.  In order to save space, I then would crush them up a bit.  I just pressed on them with a glass or bottle.  In order to use them, however, it was necessary to crush until the bits of broken shells were quite small.  I put some in a plastic bag and used a rolling pin to crush them. 

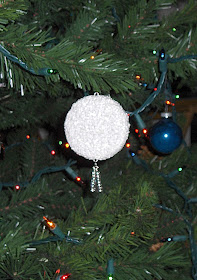
With Christmas just around the corner, I chose to make an ornaments for the tree instead of a box.  I made a total of 12, which ended up as gifts for the most part.  I still have four of them.  This one is hanging on our tree.  With my limited photography skills, I had a hard time getting a clear picture with the tree lights on. 

Being a huge fan of recycling, I started my ornaments with corrugated cardboard.  I die cut circles of corrugated cardboard (old boxes, of course) with a Sizzix circle die that's about 3" across.  To get a bit of thickness and stability, I glued 3 or 4 layers together with Mod Podge.  Then I roughly cut some larger circles from an old encyclopedia and glued one on each side, wrapping the edges around to the other side.  This covered all the openings in the edges of the corrugated cardboard. 

I used a very long needle (I think it's for making dolls) to pierce through the center of the ornament from one edge to the other, so I could add loops to attach beads and a hanger.  It was a little tricky getting the needle to go exactly through the center, but if the first shot missed, it didn't matter if there was an extra hole, since it would be covered over later.  Once I had a hole, I pushed a piece of wire through it and made a loop on each end.  And then the fun began. 

I applied decoupage medium with a foam brush and then poured a generous amount of crushed eggshells over the wet glue.  Then I gently pressed the eggshells into the glue with my fingers, because I wanted a nice solid surface without any spaces or air pockets.  Then I let this dry for at least a few hours, but usually overnight.  It actually took several days to put all the eggshells on -- two coats on each flat side and two coats around the perimeter.  I was careful to keep the wire loops free of the eggshells. 

Once all the layers were on, then it was time to paint.  I used white pearl Lumiere, again applying two coats to all the sides.  This paint dries quickly, so the waiting time between coats was a lot less than for the glue.  I pretty much used up what paint I had in the bottle and don't know if there is any place locally than sells this type of paint.  The store I purchased it from originally has since gone out of business.  I did purchase another brand of shimmery white paint, but it was more silver than white, so I decided to not use it for this project.  I think there are some places that didn't quite get two coats, but you can't tell by looking at them. 

I added a beaded spangle at the bottom and an ornament hook at the top.  I think they look like snowballs, but my daughter is convinved they are cookies coverd with shredded coconut.  They are slightly more than 1/2" thick, and surprisingly heavier than I thought they'd be, but not too heavy for hanging on the tree. 

Although these ornaments did require quite a bit of time, they were still very easy to make.  I hope you give it a try.  You could easily make these another shape, or use a colored paint instead of white for a completely different look.  So many possibilities. 

Some of the products used on this project can be purchased at Outlaw Women Scrapbook Emporium.  Thanks for stopping by. 

Tuesday, December 11, 2012

December Tag

I've made a bunch of tags so far this month. I challenged myself to make a tag a day for 12 days after making 2 tags for 2012 December.

Today, I'm sharing one of those tags here on Crafting with OWSE.


I inked the music stamp on #8 manila tag with black ink and then sprayed it with perfect pearls. Set this aside to dry.
On trimmed manila, stamp Christmas Carols with archival black, immediately add clear embossing powder, pour off extra and heat set to glossy finish. Festive berries inked applicator was used to color piece. Sprinkle with water and heat dry.
Apply Christmas Carols to tag with glue n' seal. Use distress tool around outside of tag and then use inked applicator to color edges.
Ink trim with festive berries, wad up and heat set to dry. Add to top of tag, string gold bell with gold thread and then tie to trim.
Many of the supplies can be purchased at discount prices in  Club

Monday, December 10, 2012

Late Night Hanging Out

You know that December can get rather crazy, especially for an artist/crafter. This past week I had several deadlines to meet, as well  two in-person classes, a Birthday Party and an Art Club meeting/ banquet to prepare for, shop for and cook for. Along with my full time shift work job, this makes for a marathon weekend when it all has to be finished by 9:00 AM Monday morning. Also that means I leave my house at 8:30 AM and don't go home until after Midnight Monday when my work shift is over. So Monday Musings has to be finished by 9:00 AM Monday too!

Therefore, I made this video at 3:00 AM, uploaded it by 4, and now I am at work and it's about to go live!
I'm a little fractured by that time after so much drive for days in a row, as you can see! It's ok to laugh at me!
Near the end, I am telling you about a donation our Art Club makes to Indianapolis Riley Children's Hospital every year and I couldn't recall the amount our club has donated in full. So counting the $3000 we presented to them today, our total over the years is a nice $78,324.48 ~ SWEET!!!
My art club is a Chapter of the Society of Decorative Painters, an international painting service organization. It's main charity focuses are Memory Boxes for families of newborns who pass away, and Treasure Boxes for seriously ill hospitalized children. Our chapter participates in these two charities as well as with the Quilt Raffle for Riley Hospital. The website is www.decorativepainters.org  My chapter's name is Indy Decorative Artists and our blogsite is http://indydecorativeartists.blogspot.com/


First the tiny little video:
Now the rest:

Check Out Outlaw Women Scrapbook Emporium for supplies and if you don't see it in the store, just ask myself or Robyn to add what you need.

Friday, December 7, 2012

Friday Feature - Peace Tag

Hi friends.  It's Melody with a Friday Feature for you.  I thought I was going to create a quick tag... well, I did create a tag, but it sure wasn't quick.  I think to reproduce it would be quick, but I tend to be very slow when I create.  I rarely have a plan; I just decide what I'm going to do as I create.  Even when I start out with an idea in my head, the finished project usually has no resemblance to that idea. 

I started out thinking I wanted to use a rosette made from some very old gold wrapping paper that I have.  So I made that and knew I was going to like that on my project.  I was going to die cut a shape to use as a tag, but tried a couple and didn't like either one, so I pulled out a pre-cut tag to work with. 

I used the wrinkle-free distress technique to add color to the tag.  I used iced spruce, evergreen bough and scattered straw distress inks, smooshed them on my craft sheet, spritzed with water and then pressed the tag into the ink.  I dried it with my heat gun, and then repeated putting it into the ink and heating it a couple more times. 

Then I randomly stamped some snowflakes from a Recollections Christmas stamp set with pine needles distress ink.  I added vintage photo with a foam ink applicator. 

I stamped the sentiment with jet black archival ink on ivory card stock, cut a 'V' into the ends to create a banner, added vintage photo ink and backed it with some hunter green.  I put a couple of pleats in the banner and attached it to the tag with dimensional foam tape. 

I cut three 1/4" strips of red card stock and glued them to the tag.  I attached the gold rosette over the strips and then made a flower from the smallest blossom on the tattered poinsettia die and a small flower punch.  Both of these were also edged with vintage photo ink.  In the center of the flower, I made a bunch of dots with a black copic marker and covered it with glossy accents. 

I cut some green and white yarn and attached that through the hole in the top of the tag. 

It was hard to get a good photo, because the rosette is so shiny and refected the camera flash. 

Many of the products used can be found at Outlaw Women's Scrapbook Emporium

I hope you enjoyed my tag today.  Thanks for stopping by. 

Monday, December 3, 2012

Monochromatic Winter Bell Jar Card

This is a "cool" card to make! Please enjoy the creativity and expand on your own!
P.S. Late edition edit: The stamps are either TPC Studios, or Recollections brands. The first is from JoAnns and the 2nd from Michaels. The packaging is long gone!


Here  are two finished photos:


Be sure to go check out Outlaw Women Scrapbook Emporium for all your supplies!

Friday, November 30, 2012

Friday Feature - one last sunflower

Hello, friends.  It's Melody with another Friday Feature here on the Outlaw Women's blog.  I'm not sure where last week went, but I completely missed getting a post up.  It seems if I blink, another month is gone.  Is it really December tomorrow?

Today I made a card using one new die and a couple of older ones.  I just love using the wonderful dies that are available.  It saves so much time not having to cut things out by hand.  I recently purchased the tattered poinsettia die by Tim Holtz/Sizzix, so I wanted to put it to work, but not as a poinsettia.  Don't be surprised... I've always been somewhat of a rebel, with a need to be different.  I wanted a sunflower.  Although we don't have any snow on the ground yet, we have had some flurries, but I'm just not quite ready to leave autumn behind and face winter's cold and snow. 

My base card is kraft and everything else is die cut from a manila file folder.  I used a lot of ink to change the color, though. 

I die cut a vintage cabinet card and then embossed it with the bricked embossing folder.  I randomly added color with a foam ink applicator using tea dye, scattered straw, brushed corduroy, aged mahogany, and weathered wood distress inks, and then added vintage photo around the edges. 

For the sunflower, using the tattered poinsettia die, I cut two each of the small and medium flowers, the flower center and a few extra petals from the medium flower to use as leaves.  To color them, I pulled out mustard seed, peeled paint and vintage photo distress stains.  I also swiped the peeled paint over another piece of card stock, and then cut a stem from that.  I added some rusty hinge and vintage photo distress ink to the flower petals and vintage photo to the edges of the leaves.  To give the flower more dimension, I curled the petals a bit with my fingers, and also attached some dimensional foam tape underneath.  I used a black marker to add some veins on the leaves. 

For the sentiment, I die cut one of the styled labels, stamped the sentiment from Impression Obsession with jet black archival ink and then trimmed off the ends of the lable.  I wanted it to match the background piece, so I used a small square punch to remove a bit in each corner. 

A few extra details were added with black ink and 1/4" square punch outs.

I hope you enjoyed my card today.  Many of the products used can be purchased from Outlaw Women Scrapbook Emporium.  Thanks for stopping by. 

Monday, November 26, 2012

A Christmas Tile Gift


This is a great gift because it's easy, fun and inexpensive to create. It's also very useful and can be adapted for any season or for everyday use! The sentiment stamp set used in the cards at the beginning is by Hero Arts!


Remember to check here:
for your supplies!

Tuesday, November 20, 2012

Technique Tuesday ~ 12th Day of Christmas

For my Technique Tuesday this week, I'll share a tag I made from viewing Tim's 12 days of Christmas 2011. 
Last year, all of my tags were featured in a youtube video by the publisher of Rubber Road Adventures. 


Wish upon a Star Day 12
By Judy Cantrell
                     
Supplies:
Sizzlits strip dies (Sizzix)
Clear words stamp (Stampers Anonymous)
Music stamp (Rubber Stampede)
Rock candy
Weathered wood
Snow cap
Aqua
Silver
Manila 14 pt Heavy duty folder (Staples)
Seam binding 
Metal duck tape (Lowes)
Cherub (personal stash)
Cordless glue gun (Loctite)
Adornment Star (Tim Holtz)
Silver garland (Hobby Lobby)
Black card stock (Hobby Lobby)
White tissue paper (Hobby Lobby)
White card stock (Hobby Lobby)
Button (personal stash)
Scissors (personal stash)
Bead findings (personal stash)
Printed words
Instructions:
This is my 12th day of Tim’s 12 days of Christmas tags. I’m pleased how this tag turned out using Tim’s idea and then making it my own.
On this tag I used a vintage cherub that was originally made for wedding cakes from my personal stash of supplies bought before I started stamping in 1993. 
Judy Cantrell
For more card ideas view my personal blog:


Monday, November 19, 2012

Clean and Simple, Assemblage and Assembly Lines!


This time of year, we do a lot of homemade gift-giving. A lot of us make our own cards to send to friends and family. Here is a video showing how to do a claen and simple handmade card and how to do a more involved assemblage card. The Toy Soldier assembly card is designed by Tammy Tutterow and you can see her original card here: www.tammytutterow.com 


Here are the measurements for my  Clean and Simple Retro Santa Card.

 Clean and Simple Retro Santa Card.

Card Base 5 x 7 prefolded card or 10 x 7 inch cardstock folded in the center.

Red Cardstock    6 3/4 x 4 3/4 inches

White Cardstock   6 3/8 x 4 1/4 inches.

Jenny Bowlin Cough Syrup Ink

Archival Black Ink

Tim Holtz Christmas Time CMS141 Stamp Set


Tammy's Toy Soldier Card

Kraft Cardstock

Dark Green Kraft Core Cardstock

Music Style Embossing Folder

Sizzix Toy Soldier Die

Sizzix Tattered Banners Die

Walnut Stain Distress Ink

Distress Stains Fired Brick, Picket Fence, Tea Dye, Black Soot, Metallic Stain Antique Bronze.

Studio Multi Medium Matte

Crackled Accents

Stampabilities Vintage Type Lowercase Stamps Set

Get your supplies at Outlaw Women Scrapbook Emporium

Saturday, November 17, 2012

Saturday Special - Building a Butterfly Art Journal Spread

Hi everyone it's Saturday and today I have another Saturday Special for you all.. I call it Building a Butterfly..


I created my butterfly off of the spread on a 6x6 piece of Designer Paper that had butterflys on it. First I cut out a butterfly on my Cricut using Tim Holtz's Grunge Paper. I had to use the Heavy Duty Blade going through it four times. I used the program "Makes the Cut "to find the butterfly I wanted but I'm sure there are cartridges with butterflys on them. Or you can draw one and cut it out. I then used Gesso on the Butterfly Grunge Paper to give it some tooth and then painted it with White Acrylics Paint. You could leave off the Acrylics if you wanted to have a more grungy look..I cut the butterfly in two pieces.. Now my next layer to the butterfly was a paper bag that I traced the main butterfly slightly larger..  The layer underneath the paper bag was some more Designer Paper I found with the striped pattern on it.. Then I cut out some burlap in the shape of wings and added that. The adhesive I used for all was some Matt Medium..  I grabbed a doily at this point and cutting it into fourths . I added some Distress Walnut Stain Ink to it and then added that under the designer paper and burlap wings. Under all of this I scrunched up some dress pattern paper and stapled it into the shape of wings.. I scrunched it some more once the adhesive was dry.. I attached all of this to the 6x6 Designer Paper.. I added the lace on the bottom with a strip of pearls and pearls on the top....

I then prepared my Journal.. First I gesso'd the pages and then on the right hand side I used Claudine Hellmuth's "Painterly Pink" acrylic paint. I love her paints. They are so creamy. I put the Tim Holtz Butterfly Mask down onto the spread and painted around it.  I then painted the left side with the Claudine Hellmuth paint.

Once all was dry with some more Matt Medium I adhered my 6x6 DP with my butterfly attached to it. I scrunched the dress pattern paper a little bit more so it fit on the left side good.. I stamped around the spread with a Dylusions Border stamp (Around the Edge stamp set).. and added my words ,again with stamps.. To blend in my words and give them some pop I took some Black Soot Distress Ink and rubbed it around the words.. I also used the ink on the spread randomly to bring in the black.. 

To finish off my butterfly I added some Prima flowers, a key in between the wings and some burlap on the back of the key between the two wings. Then I took a Pitt Pen (size M) and added some pen work to the butterfly. 

This would look beautiful on a Canvas also.. 

This spread was a little different for me as it doesn't have my usual background stamps and it's way more plain then I usually do. What do they say "Less is more" LOL  It was hard for me to stop but I really wanted the Butterfly to be the main focal point without anything else.. 

Most all of my products are from Outlaw Women Scrapbook Emporium

Well that's it for today.. I had a ball creating this spread.

and it was out of my norm.. LOL

as Always 

Have fun Creating!

Robyn