Pages

Tuesday, July 30, 2013

Christmas in July #5


Here is my last tag for Christmas in July. I used some of Tim's idea and then went off on my own using 
All Thing Tim supplies.  This tag was one of my favorites from December 2011. 

Thanks for Looking! 

 Supplies:
Steampunk Stamp Set #107 (Stampers Anonymous)
Odds and Ends stamp set #100 (Stampers Anonymous)
Weathered Clock dies (Tim Holtz/Sizzix)
Gadget Gears dies (Tim Holtz/Sizzix)
Grungeboard (Tim Holtz)
Craft sheet (Ranger)

Metallic gold paint dabber (Ranger)
Metallic silver paint dabber (Ranger)
Metallic copper paint dabber (Ranger)
Snow cap paint dabber (Ranger)

Archival Black ink (Ranger)
Glossy Accents (Ranger)

Stickles (Ranger)
Christmas red

Ink blending tools (Ranger)

Distress stain (Ranger)
Fired brick
Peeled paint

Distress ink pads (Ranger)
Winter seasonal,
Walnut stain,
Frayed burlap,
Black soot

Vagabond tool (Sizzix)
Tag and Bookplate dies (Tim Holtz/Sizzix)
Sprocket gears (Ranger)
Game spinner (Ranger)
Film strip (Ranger)
Tiny attacher (Ranger)
Sanding grip (Ranger)
Scissors (Ranger)

Manila 14 pt. file folder
Seam binding 
Screw brad 
Paper punch 
Cordless hot glue gun 

Monday, July 29, 2013

Remember Card

This is a simple card done with Tim Holtz Distress paints and a new Hero Arts Stamp Set.


Here is a look at the finished card. I inked the edges with Distress Inks Spiced Marmalade and Rusty Hinge.


Hope you will experiment too!

You can find the products I used at Outlaw Women Scrapbook Emporium 

Tim Holtz Distress Paint Mustard Seed
Tim Holtz Distress Paint Barn Door
Tim Holtz Distress Paint Spiced Marmalade
Tim Holtz Distress Paint Rusty Hinge
Tim Holtz Distress Paint  Vintage Photo
Tim Holtz Distress Paint  Walnut Stain
Hero Arts Stamp your Story Remember Stamp Set

Friday, July 26, 2013

Chritmas in July-Vintage Tag

Happy Friday!

We're winding down with Christmas in July.  I wanted to share a Christmas tag I made today.

I wanted to encourage you to stretch outside the box on creating Christmas themes.
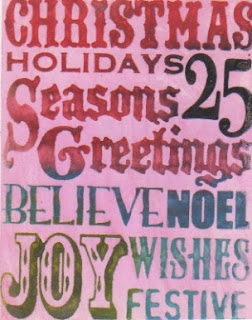
Today I used Graphic 45 French Country paper for most of my tag. I did sneak in a small square of Tim Holtz paper with the Christmas words. 

I have a new stamp from Hampton Arts: Square Face Frame.  I definitely wanted to use her some way.

So here's what I came up with:


I mounted my face onto a piece of cardboard, colored her with prisma pencils.  Coated it with glossy accents.  
I have a small piece of cheese cloth in the back, some lace and velvet ribbon on the bottom.  A couple of vintage buttons.
I love how it turned out!  
I hope this inspires you to get your Christmas groove on!! 

You can find all the products I used at our shop  HERE-Outlaw Women Scrapbook Emporium

Our prices are always 20-25% off retail. 

Thanks for stopping by!

Karen C

Tuesday, July 23, 2013

Christmas in July Week #4

Years ago before Tim Holtz had his own website, stamps and products I watched Tim on Carol Duvall show. He made a custom ink pad to make lots of cards.
This technique would be perfect if you need 25 cards in a hurry especially if you wait until December to make your cards. 

Today I'll share one using Tim's word stamp on Season's Silhouettes #117.
For this project you will need the felt pad from Ranger, place the stamp on mounting block or if you have a mounted stamp place that image down on felt pad. Draw around the mounting block or mounted stamp, cut this out. Now ink your stamp with Archival black, stamp on this piece of felt pad you cut. Gather your distress ink refills that will complement your stamp, I used 2 greens, 2 reds, 2 blues and black soot distress ink refills for this stamp. Use the dropper to color the felt. Don't worry if the colors bleed together. Just be sure to get it all colored.
Now you are ready to have some fun. You will get about 25 projects from one inking and will have to re-ink your pad.
When you are do stamping, place the inked pad in a freezer ziplock pad.

I took this project further and stamped it on coated card stock, added clear embossing powder and heat set, after it cooled, I added two colors of red watercolor crayons over the inked and embossed background and then sprayed the watercolor crayons with Glimmer Mist. It was then spread around with a large water brush. What a great color! 
This piece was made using three techniques put together.

Tip: don't cut paper close and stamp like I did on the sample, it's hard to get it straight, for best results use a stamp a ma jig.
To finish all you do is add to a folded card add sentiment to inside and it's ready to send out around Christmas time. 
I think this project would look pretty with a green Glimmer Mist as well. 
Don't use Perfect Pearls on this project. The mixture of watercolor crayons with perfect pearls made a not so pretty card.

If you would like to see a tag I made using the same pad it's on my personal blog from 2011:
http://wwwstampedimpressions.blogspot.com/2011/12/day-3-seasons-greetings.html


Monday, July 22, 2013

Special Delivery!

In honor of our friends in the UK!


I decided to restamp the corners in the Archival Black. Here is a photo:


After the video was finished the Royal baby boy was born!

You can buy the products I used at Outlaw Women Scrapbook Emporium

Tim Holtz Rosette Die
Tim Holtz Simple Sayings Stamp Set
Tim Holtz Tiny Things Stamp Set
Tim Holtz Texture Fades London Icon/Union Jack
Tim Holtz Tissue Tape
Distress Ink Vintage Photo
Distress Ink Fired Brick
Distress Ink Brushed Cordory
Distress Ink Chipped Sapphire
Coredinations Strips
Corediations Kraft Core
Bazzill Paper 81/2 X 10 Pomegranite Splash

Friday, July 19, 2013

Christmas in July-Mini album style

We're still celebrating Christmas!  It's been fun -not sure I'm going to stop at the end of the month! LOL.
Today I'm bringing you a mini album with a different binding technique.  It's made with paper bags.  I've used the cheap brown lunch bags.  Since my style is usually vintage-brown is always a nice backdrop.

Here's the binding tutorial http://www.youtube.com/watch?v=DPscV6GA9wA

 There is tons of room in these paper bag minis.  I have only one tag on the inside of each pocket, but you could easily fit 2 more or slide things you want to keep up with inside.
 There are tag pull outs inside each bag.  I used three bags.  Cut the ends off and ended up with a 5x5 area to put the designer paper in.  When you glue a corner on a page-only attach the outside edges with glue -that way you can slide a picture under the edge to hold it in place.
Here are the supplies I used from our Outlaw Women Scrapbook Emporium

Tim Holtz Christmas Stamps: holly limb, pine cone & sentiment
MME Christmas 6x6 pad paper
cardstock
adhesive
ribbon
Ranger Vintage photo distress ink
Paper cutter
Stickles

I hope you like the mini.  It will stand as well as lay out nicely on a coffee table. I love displaying my pictures in such an interesting way.  Please let me know if you have any questions.

Thanks for stopping by!
Karen C

Tuesday, July 16, 2013

Christmas in July ~ Week #3


Christmas Carols

I inked the music stamp on #8 manila tag with black ink and sprayed it with perfect pearls. Set this aside to dry. 

On trimmed manila, stamp Christmas Carols with archival black, immediately add clear embossing powder, pour off extra and heat set to glossy finish. Festive berries inker applicator was used to color piece. Sprinkle with water and heat set to dry. 


Apply Christmas Carols to tag with glue n' seal. Use distress tool around outside of tag and then use inked applicator to color edges. 

Ink trim with festive berries, was up and heat set to dry. Add to top of tag, String gold bell with gold thread and then tie to trim. Thanks for viewing and come back next week to see Christmas #4. 

You will find all the supplies I used on this tag over on http://ididitcreations.com/club/ where you get discount prices everyday.

Monday, July 15, 2013

Envelope Punch board

This is such a cool tool...I wanted to share this with you!


For those of you who may already have purchased this board from HSN...there were some errors on the first release in the envelope sizes. Here is a link to a video telling you how to obtain the correct sizes.

http://www.youtube.com/watch?v=APP0FOYJGRk


Here are some closeups for you!


You can purchase this at Outlaw Women Scrapbook Emporium...never pay retail again!

Envelope Punch Board

Envelope Punch Board

This is such a cool tool...I wanted to share this with you!


For those of you who may already have purchased this board from HSN...there were some errors on the first release in the envelope sizes. Here is a link to a video telling you how to obtain the correct sizes.

http://www.youtube.com/watch?v=APP0FOYJGRk


Here are some closeups for you!


You can purchase this at Outlaw Women Scrapbook Emporium...never pay retail again!

Friday, July 12, 2013

Merry Christmas! @ OWSE

Now that I've started making Christmas cards-I'm all about it! LOL

Today I'm using scoreboard and stylus to add some interest to the white cardstock.
I've used a 1 1/4 inch circle punch to make my ornaments.
Some MME 12 Days of Christmas DP, red ribbon, glossy accents.
If you dont have silver paper for the tiny tops of the ornaments-do like it did and emboss it in silver.

Most of these items can be found in our shop located here.

Check Outlaw Women Scrapbook Emporium-you can save 20-25% EVERYDAY!!!!


Tuesday, July 9, 2013

Christmas in July ~ Week #2


Season's Greetings

Today I'll share one of the tags I made December 2011. It's a tags I received lots of hits on my personal blog. I don't know if its because I burned both hands and fingers with a hot glue gun or they really liked this technique. I've used this stamped ink pad many times since 2011 and then if it gets to the point the color is fading all I do is re-ink with the same colors I used originally. I keep my pad in a freezer ziplock bag with the name of colors I used on the outside of bag. Store flat.


Now on with this tag.
I made a stamp using Tim's tutorial:  http://timholtz.typepad.com/my_weblog/2011/12/12-tags-of-christmastag-3.html#comments
So happy I had the Cut n' Dry stamp pad felt on hand. I remember the day I saw Tim Holtz do this technique when he was on Carol Duvall Show many years ago.
I made due with the Distress re-inkers I had on hand and stamped on Kraft manila card stock. A little tip, used distress re-inkers, other re-inkers just don't do well.
To finish this tag I made a sprig using Silhouette digital cut images. Added the sprig with hot glue.
Add bling made with alcohol inks. (red berries)
The star at the top is from Tim's idea-ology.

Supplies

Tim Holtz Texture Fades EF (Sizzix)

Tim Holtz Seasons Silhouette Stamp #117 (Stampers Anonymous)

Tim Holtz Distress Reinkers (Ranger)


Cut-n-Dry stamp felt (Ranger)

Acrylic Mounting Block (Tim Holtz)

Tim Holtz Distress inks (Ranger)

Foam Ink Applicator Tool (Inkssentials)

Craft sheet (Ranger)

Glossy Accents (Ranger)

Perfect Pearls Mist (Ranger)

# 8-Tag Die and Bookplate (Tim Holtz/Sizzix)

Sanding Grip (Ranger)

Paper Distresser (Ranger)

# 8 Kraft Manila for Tag
Silhouette Digital Craft Cutter (Silhouette America)
Star 
Bling
Card stock
Watercolors

Monday, July 8, 2013

Stamp and Paint Memory Box

Have fun with this mix of stamping and painting for a good cause!


 Supplies are DecoArt Traditions Warm White, Yellow Green Light,  Pthalo Green Yellow, Yellow Oxide, Teal Green, Carbon Black, Indian Yellow, Hansa Yellow Light, UltraMarine Blue, Dioxazine Purple, Titanium White, Quinacridone Violet, DecoArt Traditions Glaze Medium, Multi-Surface Sealer, Satin Varnish.

The DecoArt American paint list is Hauser Green Light, Hauser Green Medium, Hauser Green Dark, Petal Pink, Mulberry, Moon Yellow. Lt. Buttermilk.

Stamp are by Stampendous,  inspiration design is by Tammie Wilson of Stampendous
Ink is Ranger Archival Ink in Black.

The paint, ink and stamps can be purchased at Outlaw Women Scrapbook Emporium.


This is how I get my line work straight, remove the tape immediately and also do it slowly and gently.


The finished box:


Friday, July 5, 2013

Friday Technique/Christmas In July

We're celebrating Christmas in July!

I wanted to share a couple of things with you today. 

Embossing folders often get forgotten in our drawers.  Sizzix-Snowflurries Texture Fade
is what I'm using today.  You get both the snowman and the snowflake folders for one price!
Coupled with Tim Holtz Seasonal Paper Stash it makes an adorable vintage Christmas card.

 Here I wanted to show you you can get different effects depending on which side you emboss with.  I sanded both embossed images with Tim Holtz Sanding Grip Start light and see how it goes.
Then I dabbed some Tim Holtz Picket Fence Distress Paint lightly on the embossed areas.

 You'll probably notice Tim Holtz papers are doubled sided.  One side is a solid color. One side has images on it.  I've cut out one that has my sentiment on it. 
Even with several layers, the card is still flat enough to mail for 46cents!

One more tip.  I love RECYCLING old Christmas Cards.
I cut the sentiment from an old Christmas card, cut it out with decorative scissors.  You can get a similar oval here.
All my layers were adhered using 1/4 inch Scor-Tape.

If you're interested in any of the products I've used, just click on the unlined words and it will direct you to our store. 

Outlaw Women Scrapbook Emporium

DISCOUNT CLUB

 where you'll save  

20-25% off of Retail on our entire inventory

You simply can't beat that!

Thanks for stopping by today. Have a great weekend!


Tuesday, July 2, 2013

Christmas in July ~ Week #1

Christmas is just around the corner and time to think of ideas to make a Christmas Tag or Card!

Lets get out our holiday stamps and play this month. 
Since 2009 I've created Christmas Tags instead of a card.
They are so much fun to make! 
If you have Tim's tag die you can also make a card by placing the fold inside a little or the edge you prefer.

Three Wise Men


 I used Tim Holtz Joyful Song Stamp Set on this tag.

Ink Wise Men image with Archival black inkheat set to dry. Manila paper was used to make tag. 
Ink crackle stamp to cover tag and then apply three colors of distress inks one at a time with a foam applicator starting with the bottom color and working up the blue. If you are working on a card with these images you might want to add a sentiment, I didn't have room on thus tag with the wise men covering the tag.
Distress inks
Ink seam binding with distress stain, wad up, let dry, and then add to tag.
Distress Stains

Thanks for Looking and Have a Nice Day!! 

Monday, July 1, 2013

4th of July Tags

These tags are quick and simple! Have a great holiday, fellow Americans!


Products I used are

Momento Ink Love Letter
Momento Ink Nautical Blue
Mixed Media Ink Jasmine
TH Distress Stain Picket Fence
TH Distress Stain Faded Jeans
TH Distress Stain Barn Door
Clear Packaging
Manila Tags
TH Mini Blueprints #2 Stamps
TH Americana Silhouette Stamps
Ranger Archival Inks
Helmar Scrap Dots
Seam Binding
Clear Embossing Powder

You can find all of these products at Outlaw Women Scrapbook Emporium.