Tuesday, February 26, 2013

Technique Tuesday ~ Mini-Book

Today, I'll share with you a mini-book I made while visiting my mother a few weeks ago.


Covers:
Cut chipboard (or cereal boxes) for front and back covers: 5 1/2" x 8"
I used Kraft paper for my covers. You can purchase this in club by the yard. 
Wad the Kraft paper in a ball, smooth out and wad up again, smooth out, this will soften the paper. Place Kraft paper over chipboard, cut two pieces 7 1/2" x 10." Apply glue stick or gel medium to front of chipboard apply Kraft paper over the chipboard, smooth to get a good fit. Turn over to inside of cover and trim corner, add more glue on back of chipboard, pull excess of Kraft paper around to a smooth fit. Cover inside of cover with a trimmed piece of your choice of paper, I used the same paper as the pages.
Add distress ink to give an antique look to covers. 
Die cut clock with chipboard, distress with ink, paint clock hands with black paint, glue clock and hands to front cover. 
Complete the back cover of journal the same leaving it blank on back.
Pages:
Use paper trimmer to cut pages for the mini-book, adjust the paper shorter in length. I've made many books over the years, the pages will extend from book if not trimmed. 


Many of these stamps are Tim Holtz.
 Now I need to color this page. 

My personal blog: http://wwwstampedimpressions.blogspot.com
Judy Cantrell


Monday, February 25, 2013

Playing with Color on Canvas


Join me as I play with vibrant Dylusions Ink color on Canvas Journal Covers by Prima.


I put a few embellishments on my covers. I remembered I have a collection of tickets from a swap last year and the colors of these ticket strips went so well with the colors on my covers. the Alice in wonderland looks perfect with the Night at the Opera/This is art cover!


Friday, February 22, 2013

Friday Feature - winter arch

Hello friends.  It has been awhile since I've posted here.  Shame on me.

The OWSE Yahoo group has a monthly arch swap, with a new theme each month.  Although I didn't join the swap, I was intrigued by the arch shapes and wanted to try my own.  I thought I would follow the theme that the swap group is using.  January's theme was winter wonderland, so my first arch is a winter scene.  I searched online for arch shapes, because I wanted a different shape for each month.  I found some great arch shapes, but settled for the less elaborate shapes, since I had to cut them by hand. 

My arch base is cereal box covered with recycled coffee filters, and then coated with gesso.  This one I painted with white acrylic paint.  I created snow covered hills by cutting white card stock and lightly adding some tumbled glass distress ink on the top edges.  The one in the foreground is raised on dimensional tape.

The trees and bird are all Tim Holtz Sizzix dies.  I added some details with a black soot distress marker and added white paint with my finger to create snow covered branches.

The word winter is an old retired SU stamp, stamped with jet black archival ink.

As a final touch, I added star dust stickles on the snowy branches and on the hills.

Most of the products used can be purchased at Outlaw Women Scrapbook Emporium.

Thank you so much for stopping by. 

Tuesday, February 19, 2013

Flip-fold Template

Sharing a quick Technique Tuesday, it's my copy of a template for a flip fold card. Using this template you will get a 4 1/2" x 6" card.


Monday, February 18, 2013

Tuesday, February 12, 2013

Flower Booklet Tutorial

Technique Tuesday 


This week I'm sharing my booklet made with one sheet of card-stock. 

This is a blast from the past artwork created January 2005. 

You will find many of these supplies I used on this tutorial here:
http://ididitcreations.com/club/

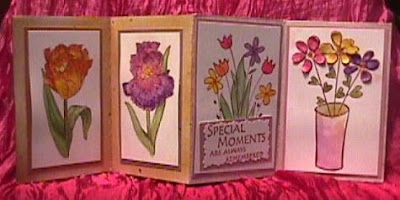
My Flower Book was made with one sheet of natural color regular weight cardstock. It was constructed by folding the cardstock in half lengthwise. Press it with a bone folder, opened it up, fold crosswise, press with bone folder, open it up again. Now bringing both lengths of cardstock to center fold, press again with the bone folder.
There are now eight scored rectangle panels on the sheet of cardstock, place sheet of scored cardstock down on a cutting mat, using a craft knife and a metal ruler as a guide cut through the center four panels where it is scored, all the way to the edge, leaving each end panels connected, (it should have a cut hole down the center of the four panels), now fold the cardstock lengthwise, with the folded edge up, hold each end near folded edge of cardstock, push to the center fold until it stops, the newly formed pages will pop out to center fold,  press the new pages again with a bone folder, there are now eight pages to decorate, the front page and last page of the book will be doubled. The top left side of the card-stock will be your Front Page.


Pick one side to be the back, on this side, stamp (Pansy Portrait) two times with Memories Black down the center four panels. Making sure that the stamped image is close to the top center. Chalk (Craft Pizazz) was used to color the pansy. Seal with matte spray (Krylon Matte Finish). After finishing the inside of the book, fold the cardstock lengthwise, seal the two end pages together with super tape leaving the center four panels open.

The Cover page: Apply green handmade paper with Click n Stick tape to cover page. The flower quote (Flower Say Hello) was inked with Burnt Sienna on glossy cardstock. Mat the quote with coordinating cardstock, apply to the front page. Use pink watercolor crayons (Lyra) to color a small piece of glossy cardstock. Burnt Sienna was used to stamp the (Tiny Jubilee Dots) on the pink glossy cardstock, a flower paper punch (EK Success) was used to make the flowers, apply to front page with adhesive photo stickers.


The First page: Lightly dry brush Sun Flower and Raw Sienna on first two panels.  I stamped the (Parrot Tulip) with Burnt Sienna on glossy cardstock, watercolor crayons with used to color the image. Place coordinating cardstock to matt the finished watercolor card, apply to the page with adhesive photo stickers.


The Second page: I stamped the (Big Iris) with Burnt Sienna on glossy cardstock, watercolor crayons and H20's were used to color the image. Attach coordinated cardstock to matt the finished card, attach stickers to back, apply to page on book.


The Third page: I stamped (Jubilee Tiny Dots) with soft rose over the page. Using glossy cardstock I stamped (Garden Flower Sketch) with Burnt Sienna, watercolor crayons (Lyra) were used to color the image. Attach a piece of coordinated mat behind the finished flower design, attach adhesive sticker to back, apply to book.. Take a small piece of glossy cardstock to stamp the quote (Moments Remembered) with Burnt Sienna, trim with Fiskars Paper Edges, matt with same color as the card, apply quote to finished card.


The Fourth page: I stamped the (Posh Sketch) with Burnt Sienna on glossy cardstock, watercolor with watercolor crayons and Twinkling H20's and a water brush. Attach another piece of coordinated cardstock to mat the flower stamped design, apply to card. On a separate piece of glossy cardstock, stamp another top section of the same image, watercolor and cut-out all petals. Roll the small petals in your hand to curl, with very small amount of glue place the petals on each of the flowers.


On the Fifth page I cut a small square of glossy cardstock, matte it with a piece of pink cardstock and applied it to the page. Memories Black was used to stamp the (Elegant Poppy) to the card. Watercolors were used to color the flower design. 


The  Sixth page: On a separate piece of cardstock stamp (Spring Tulip Sketch) with Craft Printz, pour gold embossing powder on image, pour off, heat emboss the flower design. The design was cut-out and applied to card. The quote (Flowers are Poetry) was stamped with Memories Black on a separate piece of cardstock, trimmed and applied to card.


The Seventh page: The image (Violet Border) was inked with Burnt Sienna on glossy cardstock, watercolor crayons were used to color the border stamp. I used Mulberry paper (Black Ink) in coordinating color to place behind the stamped image.


Enjoy!

Monday, February 11, 2013

Impression Embossing

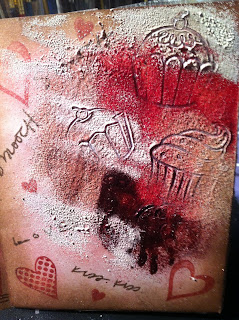
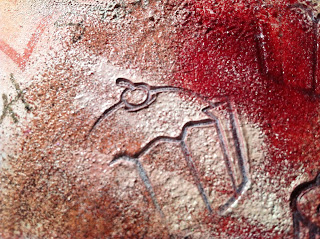
Here's a new way to use Embossing Powders:


The Stephanie Bernard stamp set is called Hearts to Die For.


You can find the Embossing Powders, Distress Ink, Cardstock, Embossing Ink and many stamps at 

Wednesday, February 6, 2013

Technique Tuesday

Technique Tuesday by Judy Cantrell 

When I starting doing collage projects years ago, I came across this technique using a sealing or tack iron. 

This is a Jonathan Talbot technique. 

1. Coat your surface with Acrylic Medium (gloss) -- the liquid-y one.  
Also coat both sides of the images you want to collage.  
When everything is dry, you can place your
images on your collage as you want them -- they will be mildly sticky, but

you can still move them around, kind of like Colorforms that we had as a

kid.  When you're happy with the way your collage looks, put a piece of
silcone paper (I use the back sheet of FedEx pouches, that you can get in
any fedex mailbox) over your collage (slippery side down against  the
collage) and iron with your tack iron for about 30 seconds.


2. Image transfer -- coat your suface with acrylic medium, and then put

acrylic medium on the FRONT side of a photocopy image you want to transfer.

When they are dry, put the image FACE DOWN on the surface where the acrylic

medium has been applied.  Iron as above, with the silicone paper.  Then wet

the back of the photocopy with a sponge and rub the paper off -- your image
will have transfered to your surface.

Monday, February 4, 2013

Making Jewelry with paper supplies

Happy Monday everyone! I am in Ohio with my mother who has had surgery and have been away for 5 days. Here is a video I made for you in advance. I hope you will find some inspiration here!
Back to my regularly schceduled program next week!