Lucy is off for a few days but she left this fabulous Altering Bottle Caps tutorial for me to post.
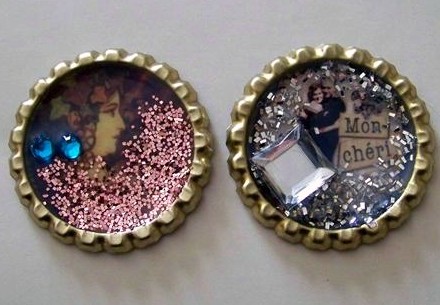
Just take a look at the finished project

This takes Steampunk to a whole new level.
Now, for Lucy's tutorial
I love creating little pieces of beauty with bottle caps. They are so easy to use and you can create pretty much anything with it.
The supplies you need:
Bottle Caps
Diamond Glaze
1 inch circle punch
Scrap of pattered paper or cardstock
Small pieces to add to the bottle cap like rhinestones, glitter or trinkets
Bottle Cap images
All of these supplies are available at
Step 1: Gather your supplies

Step 2: Decide on the pieces you will be using in the bottle cap then cut it out with the circle punch

Step 3: Add some diamond glaze to hold down the image or patterned paper then add a good amount of diamond glaze on top
Step 4: Add your rhinestones, glitter or trinkets into the bottle cap; Let it dry for 24 hours

Step 5: Then you are ready to add it to a card, ATC, layout or create a beautiful piece of jewelry with it
Here are some are examples I have made with the bottle caps:
 |
| sample 1 |
 |
| sample 2 |
 |
| sample 3 |
 |
| sample 4 |
Tip #2: You can also you a die cut machine like a BigKick, or a Cuttlebug. First place your bottle caps flat side down on the thick white A mat. Place a Cuttlebug die metal side down on top of them. Place your clear B mat on top, and put it through
the Cuttlebug.
the Cuttlebug.
Enjoy and have fun
1 comment:
Lucy I love it! I've been wanting to use bottle caps but didn't know how to do them. Thanks so much for teaching us. Definitely going to buy some now!
Post a Comment